1. Description of Project
2. Brainstorming List
3. Decision Matrix
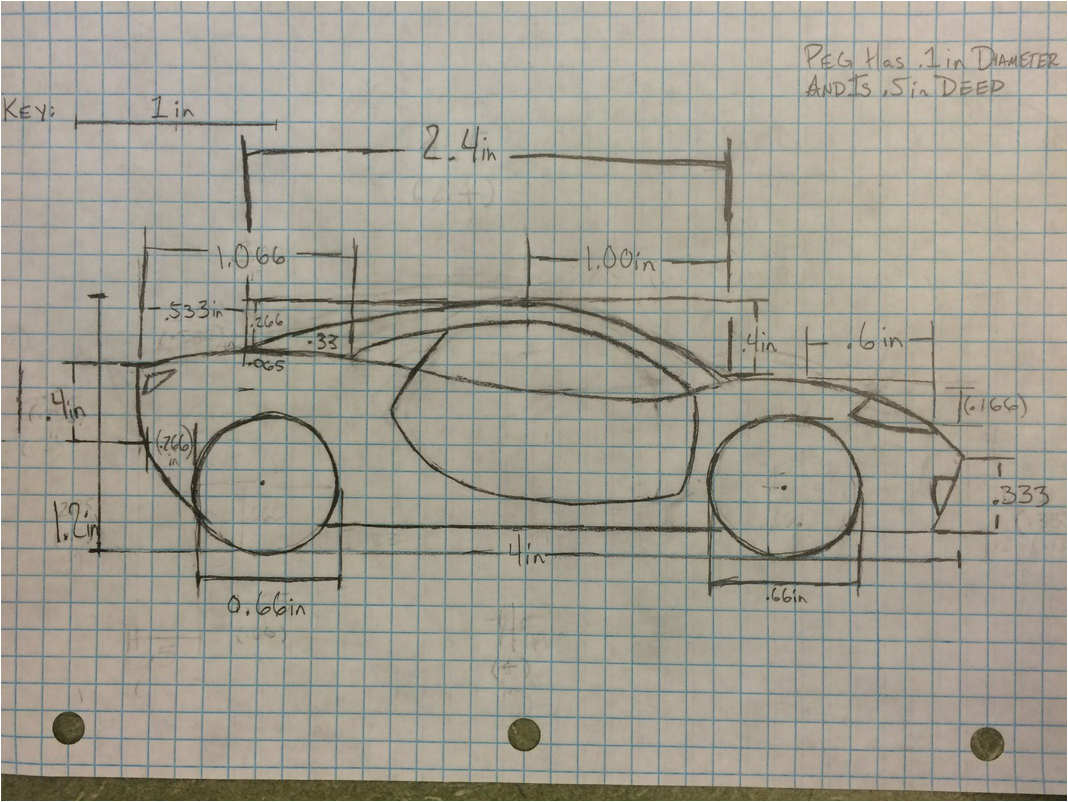
4. Final Annotated Sketch
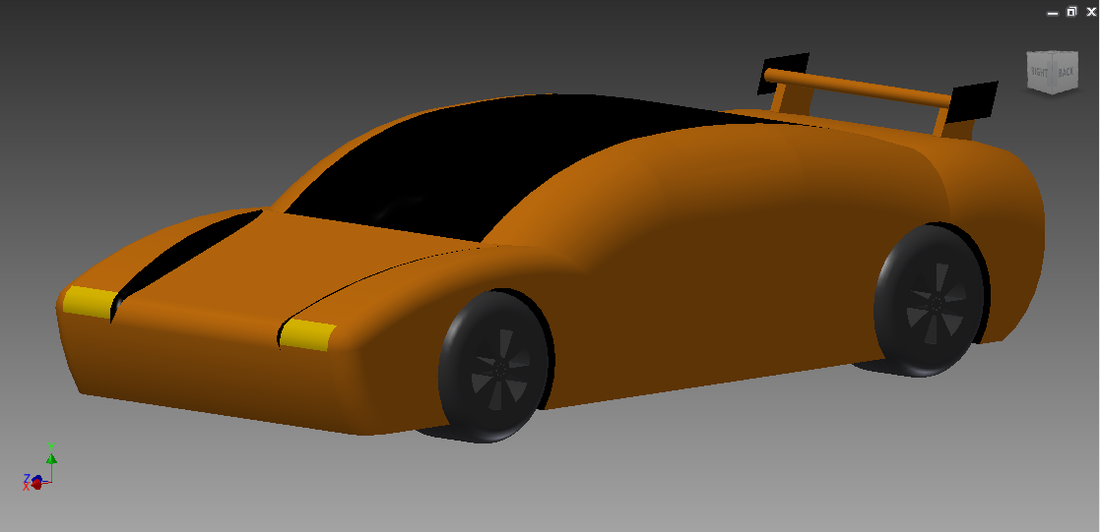
5. Picture of Vehicle Imported from Inventor
6. Fully Dimensioned Multi-View of Chassis

7. Fully Dimensioned Multi-View of Body
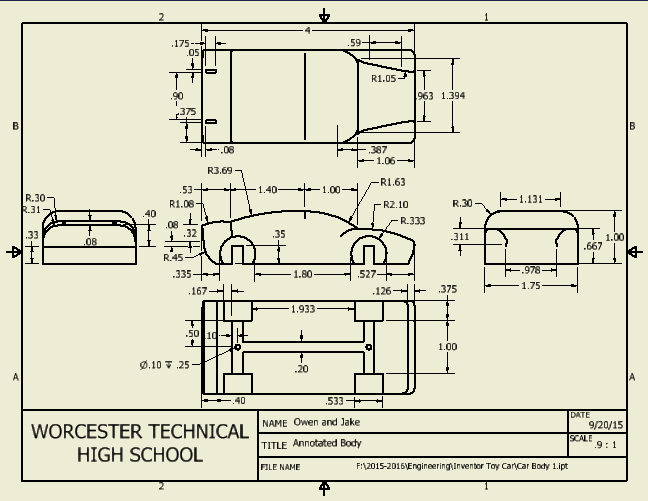
8. Fully Dimensioned Detail View of How Chassis Connects to Body
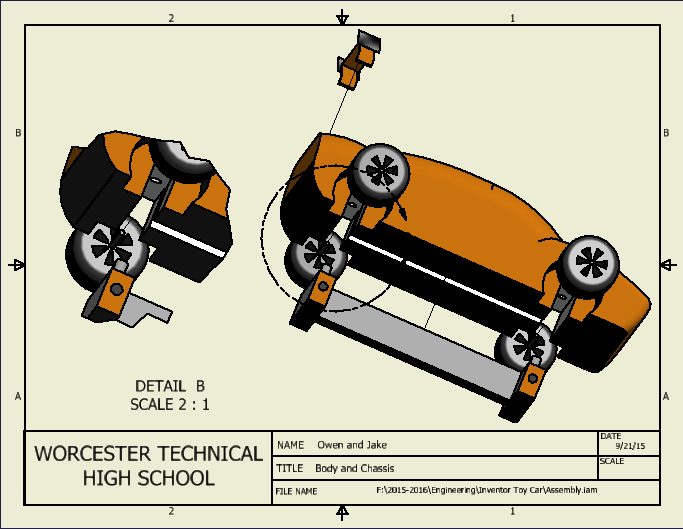
9. Presentation Drawing Showing Fully Exploded Vehicle With Bubbles and Parts List
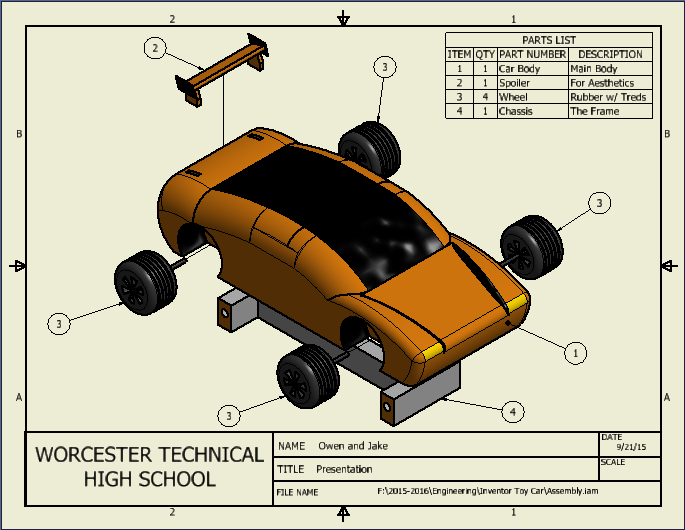
10. Presentation Drawing Showing Fully Assembled Vehicle

11. Conclusion
In conclusion, this was the first major project of the year to feature the use of Autodesk Inventor. I will have to admit, I was somewhat rusty, but after a few clicks of the mouse I was able to pick up from where I left off. The simple tool of extrusion seemed to dominate over the dozens of options that I had. This included both creating and deleting parts of the body, wheels, etc. The fillet tool, used for rounding edges, played a key role in this project mostly due to the fact that the actual car seems to have the same look. Also, the use of the peg-and-hole system worked great when it came to assembling the car. All of the parts fit together perfectly and it is pitched that you may replace those parts with other types of wheels and spoilers. If I could change this project, I would have picked a different car, one that was unique and interesting looking but also easy to replicate so that it could be recognized easily. Besides that, I have no regrets and believe the project went smoothly and as planned. I was a great way of finding and sharpening my Autodesk Inventor skills before I will use them in my Capstone Project.
